How to run your own Cloud on a PC using OpenStack on Ubuntu 12.04
June 1, 2013 9 Comments
For one of our research projects we wanted to have our own OpenStack private cloud on one of our university servers. But before trying that, I was curious to set it up on my own laptop. So I installed DevStack on Ubuntu 12.04 and played a bit with it. DevStack is the recommended option if you want to try OpenStack on your own PC. It provides the same OpenStack dashboard using which you can manage your cloud setup. In this post, I’m going to provide a step by step guide to set up a DevStack cloud.
If you already have Ubuntu 12.04 running on your PC, you can try DevStack on that. But it can make changes to your system. Therefore I didn’t want to take the risk and I went for a VM. So I installed VMware player 5 on Windows 7 and installed Ubuntu 12.04 on VMware. If you want to try the same, my previous post might be useful for you. Once you have your Ubuntu 12.04 running follow these steps.
Step 1 : Install git on Ubuntu using the following command
sudo apt-get install git
Step 2 : Install DevStack by following 3 simple steps given here. You’ll be asked to enter some passwords for different components. It will take some time to complete stack.sh execution and you’ll see following printed on your console.
Horizon is now available at http://x.x.x.x/
Keystone is serving at http://x.x.x.x:5000/v2.0/
Examples on using novaclient command line is in exercise.sh
The default users are: admin and demo
The password: xxxx
This is your host ip: x.x.x.x
stack.sh completed in 168 seconds
Step 3 : Access the dashboard by using the Horizen (name of OpenStack dashboard) URL printed above. Log in as ‘admin’ using the printed password.
Step 4 : Before creating any instances on our cloud, we have to set up some security options. Go the the ‘Project’ tab on the left and click on the ‘Access & Security’ link as shown below.
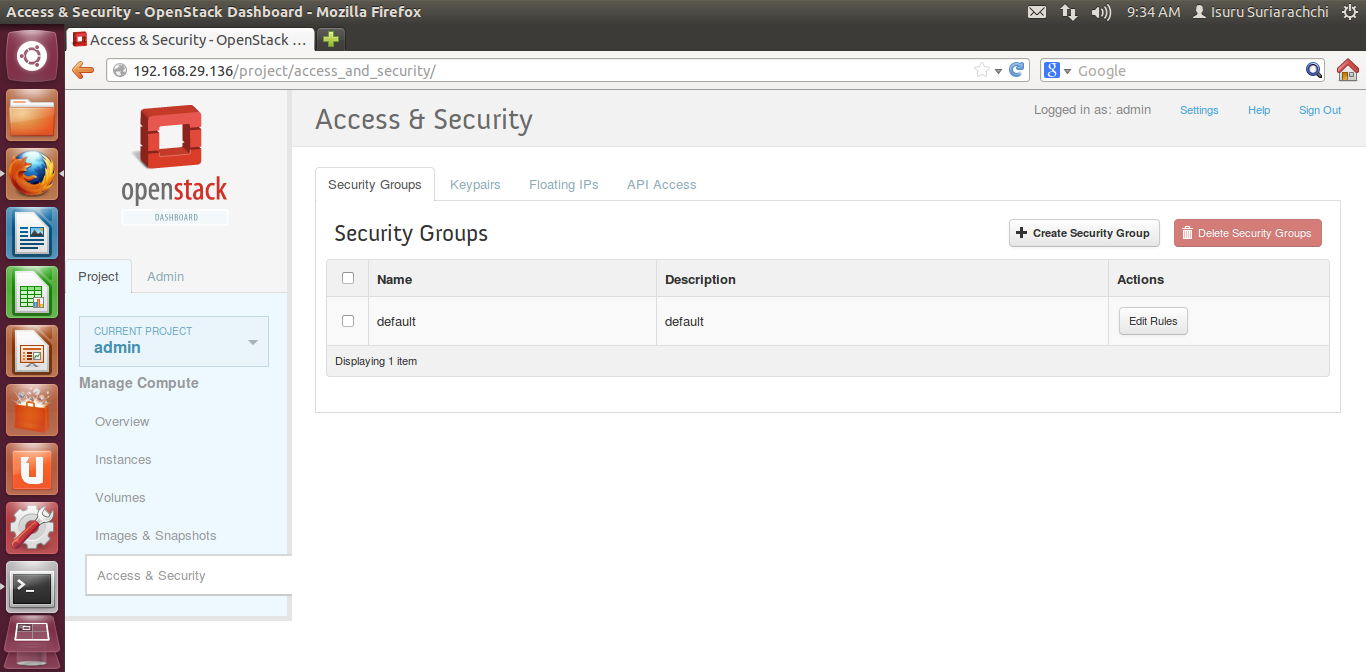
You can either edit the existing “default” security group or add a new security group. Then click on “Edit Rules” on the relevant gropu and first add a rule to enable incoming SSH connections on port 22.

Then add another rule to enable incoming ping requests on ICMP protocol. Set -1 for ICMP type and code.

So the 2 rules added should look like this.

Then we have to generate a key pair which will be used to authenticate users into the VMs. Click on the “Keypairs” tab on “Access & Security” page and click on “Create Keypair”.

Then provide a name for the keypair and click on “Create Keypair”.

Download and save the key file. It will be used to log into the VMs from outside.

Step 5 : Now we can create an instance using the security group and the key pair we created. Click on “Instances” link under “Project” tab and click on “Launch Instance”.

In the UI popped up, you can configure the instance by providing a name, size etc. under “Details” tab.

Under “Access & Security” tab we can select the key pair and the security group we created above.

After configuring the instance, click on “Launch”. Then wait till the instance comes into “Running” state.

Once the instance is up and running, you can check the log and the console.

Once you get the console, log into the instance by providing the default username and password printed on the console.

When you check the log, you’ll see something like this.

Now we have successfully created an instance on our DevStack cloud.
Step 6 : Finally if you want to SSH your instance from outside using the key file downloaded, use the following commands.
$ chmod 0600 MyKey.pem
$ ssh-add MyKey.pem
$ ssh -i MyKey.pem cirrois@10.0.0.2

how to install OpenStack on Windows 7?
I need use it with OwnCloud.
If you want to get your hands on a working OpenStack installation without any hassle, you can try the NanoStack (https://aws.amazon.com/marketplace/pp/B00F2NNR3C) on Amazon EC2. Launching a NanoStack instance and you get a working all-in-one OpenStack installation within minutes. It’s really easy. This is a PAID AMI but it’s an pretty inexpensive way to try OpenStack.
Reblogged this on Tech Geeks.
Met with an error
sed: can’t read /etc/nova/nova.conf
https://bugs.launchpad.net/devstack/+bug/1248923
Hi.
I need to setup a local OpenStack-based IaaS Provider on which I have to set up WSO2 Private PaaS. The problem is that at the end of stack.sh script, after logging as admin (or ‘demo’ user) on DevStack dashboard, I do *NOT* see the button named ‘Create Security Group’ in ‘Access & Security’ section. It seems completely absurd to me and this way I cannot complete the ‘boot.sh’ script of my private paas [ all this locally, on the same machine, for experimental scope ].
Can you help me with it ? (note: the firewall, iptables, is stopped in this context)
The OS is Centos.
Thanks in advance.
Hey Francesco,
Did you ever manage to fix this? I’m running into the same problem
I have the same problem, did u guys find a solution?
Hello,
I have make a little guide to try OpenStack for free with TryStack.
http://www.julienlenne.com/2014/12/04/try-openstack-for-free-with-trystack/
Thank you, Julien
After installing OpenStack on my laptop how do I connect another laptop to the laptop which is now the cloud server to use some actual cloud like service?